整理了vue2 和 vue3的组件通信方法,vuex,pinia不作为此次重点
父子:父组件与子组件通信
子父:子组件与父组件通信
vue组件通信 1、props(父子,子父) 父组件传递的并非函数:父亲给儿子传递数据
父组件传递函数:实质为儿子想给爹传数据
==注意==:vue3使用defineProps来接收父组件传递的信息
vue2代码实现: 1 2 3 4 5 6 7 8 9 10 11 12 13 14 15 16 17 18 19 20 21 22 23 24 25 26 27 28 29 30 31 <!-- 父组件 --> <template> <div> <h2>我是父组件</h2> <div>我有一辆车---{{ msg }}</div> <div>儿子给的{{ fromSon }}</div> <!-- 子组件 updataCar是一个函数updataCar --> <Child :car="msg" :updataCar="updateCar" /> </div> </template> <script> import Child from './components/Child.vue' export default { name: 'App', data() { return { msg: '奔驰', fromSon: '', } }, components: { Child, }, methods: { updateCar(cars) { this.fromSon = cars }, }, } </script>
1
2
3
4
5
6
7
8
9
10
11
12
13
14
15
16
<!-- 子组件 --> <template> <div> <h3>我是子组件</h3> <p>爸爸给我的---{{car}}</p> <button @click="updataCar('三轮车')">我给爸爸换辆车</button> </div> </template> <script> export default { name:'Child', // 接收父组件传递的信息 props:['car','updataCar'] } </script>
vue3代码实现: 1 2 3 4 5 6 7 8 9 10 11 12 13 14 15 16 17 18 19 20 21 22 23 24 //父组件 <template> <div class="box"> <h1>组件间通信1: props</h1> <h1>我是父组件:{{car}}</h1> <hr> <!--父组件给儿子传递数据:props--> <Child :car="car" :updateCar="updateCar"></Child> </div> </template> <script lang="ts" setup> //定义响应式数据 import {ref} from 'vue'; //引入子组件:不需要注册 import Child from './Child.vue'; //定义响应式数据car let car = ref('法拉利'); //定义父亲的方法 const updateCar = (cars:string)=>{ car.value = cars; } </script>
1 2 3 4 5 6 7 8 9 10 11 12 13 14 15 16 17 18 //子组件 <template> <div class="box"> <h2>Child component</h2> <h3>Car:{{car}}</h3> <button @click="updateCar('三轮子')">子级组件修改数据</button> </div> </template> <script lang="ts"> export default { } </script> <script lang="ts" setup> //接受父组件传递过来props->vue3:defineProps defineProps(['car','updateCar']) </script>
2、自定义事件(子父)
==注意==:原生DOM事件:click|dblclick|change|blur|mouse…….
在Vue2的事件当中,@后面紧随的都是自定义事件(.native可以变为原生DOM事件)
在Vue3事件当中,@click原生DOM事件,除非在子组件内部defineEmits(),才会变化自定义事件
方法:在父组件里定义一个函数,子组件使用$emit触发
vue2代码实现 1 2 3 4 5 6 7 8 9 10 11 12 13 14 15 16 17 18 19 20 21 22 23 24 25 26 27 28 29 30 31 32 33 34 35 36 37 38 39 40 41 42 43 44 //父组件 <template> <div> <h1 class="box">vue2:事件研究</h1> <h1>原生DOM事件</h1> <button @click="handler">vue原生DOM事件</button> <!-- 写了(),传递事件对象需要使用$event --> <button @click="handler1($event)">vue原生DOM事件</button> <hr /> <!-- V2事件修饰符:.once|.stop|.prevent|.native --> <Child @click.native="handler3" @xxx="handler4"></Child> <Child @update:jch="handler5"></Child> </div> </template> <script> //引入子组件 import Child from './components/Child.vue' export default { //注册 components: { Child, }, methods: { // 原生DOM事件:event事件对象 handler(e) { console.log('原生DOM事件之点击事件', e) }, handler1(e) { console.log('原生DOM事件之点击事件', e) }, handler3() { console.log('使用native触发了原生DOM事件') }, // 自定义事件:注入的$emit传递过来的参数 handler4(params) { console.log(params) }, handler5(params) { console.log(params) }, }, } </script>
1 2 3 4 5 6 7 8 //子组件,使用$emit触发自定义事件 <template> <div> 我是子组件Child <button @click="$emit('xxx','自定义事件xxx')">触发xxx自定义事件</button> <button @click="$emit('update:jch','YYDS')">触发自定义事件update:jch</button> </div> </template>
vue3代码实现 1 2 3 4 5 6 7 8 9 10 11 12 13 14 15 16 17 18 19 20 21 22 23 24 25 26 27 28 29 30 31 32 33 34 35 36 37 38 39 40 41 42 43 44 45 //父组件 <template> <div> <h1>vue原生DOM事件{{ count }}</h1> <button @click="handler($event)">点击我输出爱你呦</button> <hr /> <!-- 在Vue3世界当中click|focus|blur|change|mouseenter 不管是绑定原生标签、自定义标签(组件),都是所谓原生DOM事件 //底层实现原理:事件的委派,把事件绑定在组件标签根节点上 --> <Event1 @click="handler1"></Event1> <hr /> <Event2 @click="handler2" @xxx="handler3" @update:count="handler4"></Event2> </div> </template> <script setup lang="ts"> import { ref } from 'vue' //引入子组件 import Event1 from './Event1.vue' import Event2 from './Event2.vue' let count = ref(0) //原生DOM点击事件回调 const handler = (e: MouseEvent) => { console.log(e, '爱你哟') } //自定义标签事件回调 --- 原生dom事件 const handler1 = (event: MouseEvent) => { console.log('event1', event) } //自定义标签Event2---自定义事件click回调 const handler2 = (params: string) => { console.log(params) } //自定义标签Event2---自定义事件xxx回调 const handler3 = (params: string) => { console.log(params) } //第三个按钮的自定义事件回调 const handler4 = (params: number) => { count.value = params } </script>
1 2 3 4 5 6 7 8 //子组件1 <template> <div class="box"> <h2>Event1组件</h2> <span>其它内容</span> </div> </template> <script lang="ts">
1 2 3 4 5 6 7 8 9 10 11 12 13 14 15 //子组件2 <template> <div class="box"> <h2>Event2组件</h2> <button @click="emit('click','爱你呦')">分发自定义click事件</button><br /> <button @click="emit('xxx','貂蝉')">分发自定义xxx事件</button><br /> <button @click="emit('update:count',60)">分发自定义事件更新父组件数据</button> </div> </template> <script lang="ts" setup> //可以定义自定义事件emit->触发自定义事件 //defineEmits(["click"]),返回值emit函数,类似于vue2的$emit let emit = defineEmits(["click",'xxx','update:count']); </script>
3、事件总线(任意组件)
vue2中使用$bus,接收数据使用$on, 发送数据使用$emit
vue3使用插件mitt,接收数据使用on,发送数据使用emit
$bus原理
vue2代码实现
安装总线:
1 2 3 4 5 6 7 8 9 new Vue ({ beforeCreate ( Vue .prototype $bus = this } })
使用总线:
接收数据的组件: $on
1 2 3 4 5 6 7 8 9 methods : { test (value ){ } }, mounted ( this .$bus .$on('xxxx' ,this .test ) }
提供数据的组件:$emit
1 this .$bus .$emit('xxxx' ,数据)
vue3代码实现 1 2 3 4 5 import mitt from 'mitt' export default mitt ()
1 2 3 4 5 6 7 8 9 10 11 12 13 //组件1 <template> <div class="box"> <h2>我是大哥刘备</h2> <button @click="sendJian">给老弟关羽:送装备</button> </div> </template> <script lang="ts" setup> import bus from '../../bus' const sendJian =()=>{ bus.emit('jian','AK47'); } </script>
1 2 3 4 5 6 7 8 9 10 11 12 13 14 15 16 17 18 19 20 21 22 //组件2 (与组件1是兄弟组件) <template> <div class="box"> <h2>我是老弟关羽:大哥给的{{jians}}</h2> </div> </template> <script lang="ts"> export default { } </script> <script lang="ts" setup> import bus from '../../bus'; import {onMounted,ref} from 'vue'; let jians = ref('') //组件挂载完毕绑定自定义事件 onMounted(()=>{ bus.on('jian',(zbs:string)=>{ jians.value = zbs; }) }) </script>
4、PubSub(任意组件)
订阅消息:使用subscribe,取消订阅unsubscribe
发布消息:使用publish
先订阅,在发布!
vue2/vue3用法相同 1 2 3 4 5 6 7 8 9 10 11 12 13 14 15 16 17 18 19 20 21 22 23 24 25 26 27 28 29 30 31 32 <!-- 组件1,订阅消息 --> <template> <div class="box"> <h2>Child333 component</h2> <h3>msg:{{msg}}</h3> </div> </template> <script lang="ts"> export default { name: 'Child3' } </script> <script lang="ts" setup> // 引入PubSub import PubSub from 'pubsub-js' import { onMounted, onBeforeUnmount, ref } from 'vue' const msg = ref('') // 挂载后 onMounted(() => { // 订阅消息:订阅的回调函数 type:消息类型 data:才是兄弟传递过来的数据 //pid是为了方便取消订阅 this.pid = PubSub.subscribe('child3Data',(type,data)=>{ msg.value = data; }) }) // 销毁前 onBeforeUnmount(() => { // 取消订阅 PubSub.unsubscribe(pid) }) </script>
1 2 3 4 5 6 7 8 9 10 11 12 13 14 15 //组件2,发布消息 <template> <div class="box"> <h2>Child4 component</h2> <button @click="updateData">更新兄弟组件数据</button> </div> </template> <script lang="ts" setup> // 引入PubSub import PubSub from 'pubsub-js' const updateData=()=>{ // 发布消息 PubSub.publish('child3Data','大白菜') } </script>
5、v-model(父子)
v-model可以实现==父子组件的数据同步==!!!
原理:props + 自定义事件
(文本框)
V2:value + input
V3:modelValue + update:modelValue
vue2代码 1 2 3 4 5 6 7 8 9 10 11 12 13 14 15 16 17 18 19 20 21 22 23 24 25 26 27 //父组件 <template> <div> <h1>我是父组件APP</h1> <h1>v-model将要在组件标签身上使用:{{ car }}</h1> <jch-input :value="car" @input="car = $event"></jch-input> <jch-input v-model="car"></jch-input> </div> </template> <script> //引入子组件 import Child from './components/Child.vue' export default { name: '', data() { return { phone: '爱你呦', car: '法拉利', } }, components: { 'jch-input': Child, }, } </script>
1 2 3 4 5 6 7 8 9 10 11 12 13 14 //子组件 <template> <div class="box"> <span>这是wo自己封装的input组件</span> <input type="text" :value="value" @input="$emit('input',$event.target.value)"> </div> </template> <script> export default { name: '', props:['value'] } </script>
vue3代码 1 2 3 4 5 6 7 8 9 10 11 12 13 14 15 16 17 18 19 20 21 22 23 24 25 //父组件 <template> <div> <h1>底下是组件标签使用v-model</h1> <JCHInput :value="car" @input="car = $event"></JCHInput> <!-- 以下这种在组件标签身上写法,不能用了 --> <!-- <JCHInput v-model="car"></JCHInput> --> <!-- <JCHInput1 :modelValue="car" @update:modelValue="car = $event"></JCHInput1> --> <JCHInput1 v-model="car"></JCHInput1> </div> <h1>我是爸爸:{{page}}{{limit}}</h1> <JCHPagination :page="page" @update:page="page=$event"></JCHPagination> <JCHPagination v-model:page="page" v-model:currentPage="limit"></JCHPagination> </template> <script setup lang="ts"> import { ref } from "vue"; import JCHInput from "./CustomInput.vue"; import JCHInput1 from "./CustomInput2.vue"; import JCHPagination from './ElPagination.vue'; let car = ref("法拉利"); //定义分页器页码 let page = ref(1); let limit = ref(3); </script>
1 2 3 4 5 6 7 8 9 10 11 12 13 14 //子组件CustomInput2 <template> <div> <p> 我是子组件B <input type="text" :value="modelValue" @input="emit('update:modelValue',$event.target.value)"> </p> </div> </template> <script setup lang="ts"> defineProps(['modelValue']) let emit = defineEmits(['update:modelValue']) </script>
1 2 3 4 5 6 7 8 9 10 11 12 13 14 15 16 17 //子组件CustomInput <template> <div> <p>我是子组件A</p> <input type="text" :value="value" @input="emit('input', $event.target.value)" /> </div> </template> <script setup lang="ts"> //接收Props defineProps(["value"]); let emit = defineEmits(["input"]); </script>
6、$attrs与$listeners(父子)
$attrs:包含了父作用域中不作为 prop 被识别 (且获取) 的 attribute 绑定 (class 和 style 除外)。
$listeners:包含了父作用域中的 (不含 .native 修饰器的) v-on 事件监听器。它可以通过 v-on="$listeners"
==注意==:
vue3使用useAttrs
v-bind对象写法:可以给DOM|组件绑定多个属性,v-bind不能简写
传入内部组件——在创建更高层次的组件时非常有用。(封装ui组件库)
1 2 3 4 5 6 7 8 9 10 11 12 13 14 15 16 17 18 19 20 21 22 23 24 25 //父组件 <template> <div> <h1>element-plus:UI组件库的使用</h1> <HintButton type="warning" size="mini" :icon="Plus" jch_title="添加SKU" @click="handler" >添加SKU</HintButton > </div> </template> <script setup lang="ts"> import { Plus } from "@element-plus/icons-vue"; //引入提示组件 import HintButton from "./HintButton.vue"; const handler = () => { alert(1233); }; </script>
1
2
3
4
5
6
7
8
9
10
11
12
13
14
15
16
17
18
//子组件 <template> <div> <el-tooltip :content="jch_title"> <!--v-bind对象写法:可以给DOM|组件绑定多个属性,v-bind不能简写--> <el-button v-bind="$attrs">{{ jch_title }}</el-button> </el-tooltip> </div> </template> <script setup lang="ts"> //vue核心库提供一个useAttrs方法,类似于v2:$attrs import { useAttrs } from "vue"; //获取父亲传递过来的全部属性 let $attrs = useAttrs(); //$attrs:可以获取父亲给的属性+方法[原生DOM事件|自定义事件] defineProps(["jch_title"]); </script>
7、sync属性修饰符(父子数据同步)
vue2使用,vue3已废弃
主要的作用是父子组件数据同步,原理:props+uptate自定义事件
vue2代码 1 2 3 4 5 6 7 8 9 10 11 12 13 14 15 16 17 18 19 20 21 22 23 24 25 26 27 //父组件 <template> <div> <h1>我是父组件APP{{msg}}</h1> <!-- sync:属性修饰符,主要的作用是父子组件数据同步 --> <!-- 底下写法:给子组件传递props visite 第二件事情:给子组件绑定一个自定义事件 update:visite --> <Child :visite.sync="msg"></Child> </div> </template> <script> import Child from './components/Child.vue' export default { name: '', data() { return { msg:'我爱你塞北的大雪啊' } }, components:{ Child } } </script>
1 2 3 4 5 6 7 8 9 10 11 12 13 14 //子组件 <template> <div class="son"> <span>子组件接受父亲给的{{visite}}</span> <button @click="$emit('update:visite','吃火锅')">点击我给爸爸传递数据让我两同步</button> </div> </template> <script> export default { name: '', props:['visite'] } </script>
8、ref与$parent与$children(父子,字符)
ref:获取组件实例
$parent:获取父组件实例,很少用下角标获取组件[不靠谱]
$children :获取所有的子组件实例,返回一个数组
==注意:==
vue3中组件的变量、方法默认对外暴露,常量不默认暴露,使用defineExpose暴露常量 vue3中移除了$children vue2中常量不需要对外暴露
vue3写法 1 2 3 4 5 6 7 8 9 10 11 12 13 14 15 16 17 18 19 20 21 22 23 24 25 26 27 //父组件 <template> <div class="box"> <p>BABA有存款:{{money}}</p> <button @click="jieqian(100)">找小明借钱100</button><br /> <br /> <Son ref="songRef" /> <br /> <Daughter /> </div> </template> <script lang="ts" setup> import Son from "./Son.vue"; import {ref} from 'vue' //组件的变量|方法默认对外暴露 let money = ref(200000); let songRef = ref(); //找小明借钱的回调 const jieqian = (num:number)=>{ money.value+=num; songRef.value.money-=num; } //对外暴露常量 defineExpose({ money }) </script>
1 2 3 4 5 6 7 8 9 10 11 12 13 14 15 16 17 18 19 20 21 //son组件 <template> <div class="box"> <h3>儿子小明: 有存款: {{money}}</h3> <button @click="handler(50,$parent)">给BABA钱: 50</button> </div> </template> <script lang="ts" setup> import {ref} from 'vue' const money = ref(30000); //vue3当中模板里面:$event事件对象 $parent获取父组件 //按钮的点击事件回调 const handler = (num:number,father:any)=>{ money.value-=num; father.money+=num; } //把子组件的常量对外暴露:别的组件可以访问,默认不对外暴露 defineExpose({ money }); </script>
9、provide和inject(任意)
provide:信息提供者
inject:信息接收(注入)者
注意:
provide和inject:vue2中为配置对象,vue3中为函数
代码 1 2 3 4 5 6 7 8 9 10 11 12 13 14 15 16 17 18 19 20 //组件1 <template> <div> <h1>我是爷爷</h1> </div> </template> <script> import Child from './components/Child.vue' export default { name: '', //配置项 provide:{ msg:'我是爷爷,给你留下一幅画' } //vue3写法 //provide('msg','我是爷爷,给你留下一幅画') } </script>
1 2 3 4 5 6 7 8 9 10 11 12 13 14 15 16 17 18 //组件2 <template> <div> <h1>我是熊孩子</h1> <div>{{ msg }}</div> </div> </template> <script> export default { name: '', inject: ['msg'], //vue3写法 //let msg = inject('msg') } </script>
10、插槽
作用:实现父子组件通信,爹可以给儿子传结构!!!!
作用域插槽 :
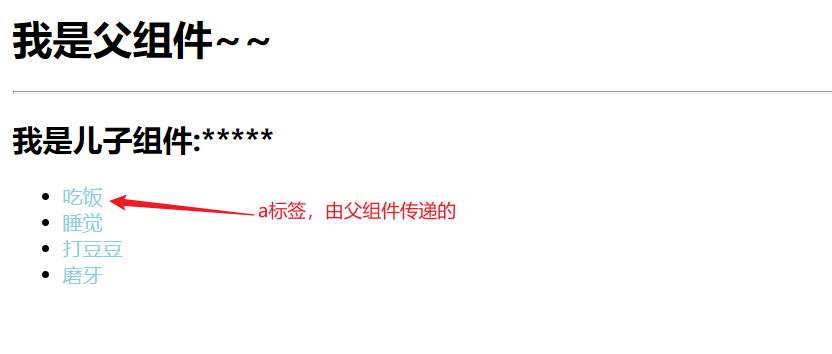
1 2 3 4 5 6 7 8 9 10 11 12 13 14 15 16 17 18 19 20 21 22 23 24 25 26 27 //父组件 <template> <div> <h1>我是父组件~~</h1> <hr /> <List :data="todoList"> <!--作用域插槽:v-slot接受子组件回传的数据,简写为# 回传的数据默认对象 {row:{id:xxx,title:'xxx',done:false}} --> <template #="{ row, index }"> <a>{{row.title}}</a> </template> </List> </div> </template> <script setup lang="ts"> //引入子组件 import List from './List.vue' import { ref } from 'vue' //父组件准备一个数据:模拟todoList const todoList = ref([ { id: 1, title: '吃饭', done: false }, { id: 2, title: '睡觉', done: true }, { id: 3, title: '打豆豆', done: false }, { id: 4, title: '磨牙', done: true }, ]) </script>
1 2 3 4 5 6 7 8 9 10 11 12 13 14 15 16 17 18 19 //子组件list <template> <div> <h2>我是儿子组件:*****</h2> <ul> <li v-for="(todo, index) in data" :key="todo.id"> <!--作用域插槽: 底下的这种写法并非props,作用域插槽的语法要求 <slot :row="todo"></slot> --> <slot :row="todo" :index="index"></slot> </li> </ul> </div> </template> <script setup lang="ts"> defineProps(['data']) </script>
实例:
11、状态管理工具
vuex 和 pinia